Welcome to DU!
The truly grassroots left-of-center political community where regular people, not algorithms, drive the discussions and set the standards.
Join the community:
Create a free account
Support DU (and get rid of ads!):
Become a Star Member
Latest Breaking News
Editorials & Other Articles
General Discussion
The DU Lounge
All Forums
Issue Forums
Culture Forums
Alliance Forums
Region Forums
Support Forums
Help & Search
Cooking & Baking
Related: About this forumJulia Child - Un Par Un : LE SAINT-CYR, GLACE 🌞
Last edited Mon Dec 1, 2025, 07:18 PM - Edit history (2)

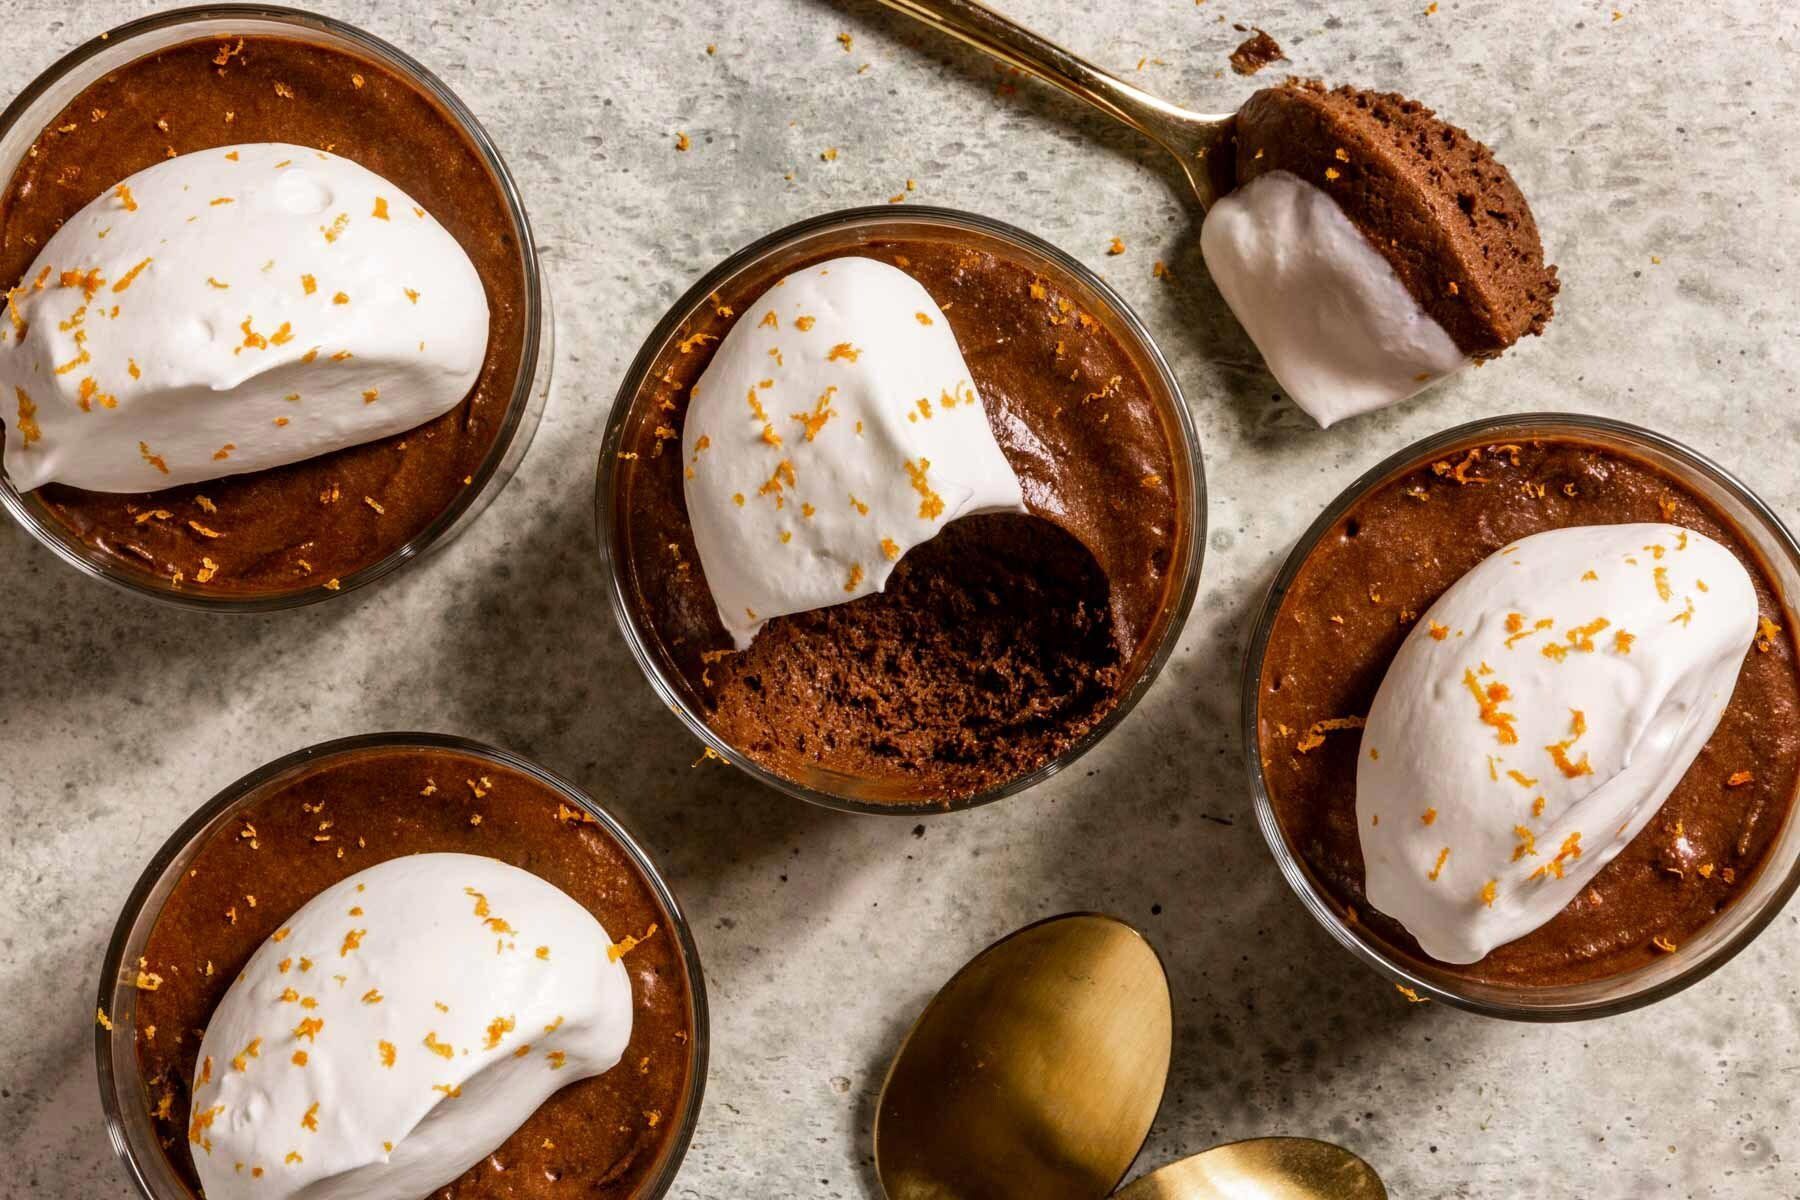
LE SAINT-CYR, GLACÉ
[Frozen Chocolate Mousse Molded in Meringues]
Here is a handsome dessert for those happy times when you can
indulge in whipped cream and chocolate. It is a mold of frozen
chocolate mousse in the form of a cylinder with ribbons of white
meringue marching around the circumference. It will remind you of
the tall képis, the decorative caps, worn by the officers of Saint-Cyr,
the famous French military academy. You can add a visor, edible or
not, if you want to complete the picture.
A NOTE ON MERINGUES AND MANUFACTURING METHODS
This dessert is easy to make when you have an electric beater on
a stand; if you don’t mind holding on for a while, however, a
portable beater is perfectly satisfactory. Rather than being the usual
meringue of egg whites beaten to stiff peaks and sugar then folded
in, this is the Italian meringue, where boiling sugar syrup is beaten
into the stiff egg whites, and the beating continues for 8 to 10
minutes, or until the meringue is cool and forms stiff peaks. It has a
double advantage: the meringue shapes bake in half the time of
ordinary meringues and the rest of the meringue mixture can be
used for the chocolate mousse. Thus you need not bother making a
custard base with its attendant beating of sugar and egg yolks over
heat; instead, you beat melted chocolate right into the meringue
mixture, fold in the whipped cream, and the mousse is made. A
further recommendation is that the mousse does not become hard
and stiff when frozen; it retains a tender, creamy quality.
For an 8-cup mold, serving 8 to 10 people
1) The meringue mixture—meringue italienne—1½ quart
Measure out all the ingredients for
this step so that while the sugar is
boiling you can finish beating the egg
whites.
****
2 cups sugar
⅔ cup water
A heavy 1½- to 2-quart
saucepan with cover
Combine sugar and water in saucepan and set over moderately
high heat. Swirl pan slowly by its handle, but do not stir sugar with a
spoon while liquid is coming to the boil. Continue swirling for a moment
as liquid boils and turns from cloudy to perfectly clear. Cover pan, reduce
heat to low, and let simmer slowly while you beat the egg whites.
****
¾ cup egg whites (6 egg whites) at room
temperature
An electric mixer with large (3-quart) clean,
dry bowl and blades
Big pinch salt
¼ tsp cream of tartar
½ tsp vanilla extract
Turn egg whites into mixer bowl, and start at slow speed for a minute or so,
until egg whites begin to foam up. Beat in the salt and cream of tartar,
and gradually increase speed to fast, until egg whites form stiff peaks. Beat in
the vanilla.
****
Optional but useful:
a candy thermometer
A quart glass measure
with 2 cups cold water
and 2 ice cubes
A metal spoon
Remove cover from sugar syrup, and insert candy thermometer if you are
using one. Boil rapidly, and when bubbles begin to thicken, watch
temperature or start dropping driblets into iced water. Boil to 238
degrees, the soft-ball stage—sugar makes a sticky but definite shape
when worked in cold water with your fingers.
Immediately start beating egg whites at moderate speed,
dribbling boiling syrup into them until all is used. Continue beating
egg whites at moderate speed until cool, and until mixture forms
stiff peaks when lifted—when you draw a spatula through it, the
walls of meringue on either side of the path remain erect and
unmoving. (If you are using a portable beater, you may set the
meringue bowl in a basin of cold water to speed the cooling.)
Beating time: 8 to 10 minutes using a beater on a stand.
2) Baking the meringue decorations—about 1 hour at 200 degrees
2 pastry sheets about 12 by 16 inches, no-stick
if possible, buttered and floured
A rubber spatula
The dessert mold: an 8-cup cylindrical charlotte mold, baking
dish, or even a flower pot, at least 4 inches deep
½ the meringue mixture (3 cups)
A canvas pastry bag 12 to 14 inches long with ¾-
inch cannelated ribbon-tube opening
A small knife (to cut off meringue from tube when necessary)
Whatever you decide upon, scoop the meringue mixture into the
pastry bag, and squeeze out shapes between the guidelines on the
pastry sheets, making the decorations ⅛ to 3⁄16 inch thick, and no
more than 1½ inches wide. You will need 12 to 16 perfect
specimens, therefore use up all the meringue in the bag; muffed
shapes can be layered with the mousse, and you will have some
breakage after baking because the meringues will be brittle.
Set baking sheets in upper- and lower-middle levels of oven for
about an hour, or until you can gently nudge a few loose from
baking surface. They will not puff up, they will not change shape,
and they should remain pure white; they simply dry out. While still
warm, they bend slightly; as soon as they are cool, they become
crisp and fragile. Remove baking sheets from oven, push all
meringues gently loose, but leave them on the baking sheets.
3) The chocolate mousse—mousse au chocolat meringuée—about 8 cups
12 ounces semisweet baking chocolate
3 ounces unsweetened baking chocolate
A saucepan for the chocolate, and cover for the pan
⅓ cup dark rum
A saucepan of simmering water removed from heat, large enough to
hold chocolate pan
The dessert mold from Step 1
1 Tb soft butter
Waxed paper
Break up the chocolate, and place in the saucepan with the rum; cover,
and set it in the pan of hot but not simmering water. While chocolate is
melting, fold an 18-inch piece of waxed paper in half lengthwise, cut
in two along fold, and with the 2 pieces held together, cut into blunt
ended wedges 5 to 6 inches at the wide end, 2½ inches at the blunt end,
and ½ inch longer than depth of mold. Cut a circle of waxed paper to
fit in bottom of mold exactly, and place it in the mold. One at a time,
dot soft butter on one side of waxed paper wedge and insert against inside
edge of mold, small end of wedge at bottom; butter holds paper in place.
Continue around inside of mold, overlapping paper so that mold is
completely covered. Refrigerate in order to set butter and keep paper
glued to mold.

****
The meringue mixture remaining from Step 2
2 cups chilled whipping cream in a beating bowl
A larger bowl with a tray of ice cubes and water to cover them
A large (balloon) wire whip, or a hand-held electric beater with
clean, dry blades
As soon as chocolate is melted, and you have beaten it to a soft, smooth
texture, whip it into the meringue mixture. In its separate bowl, set
cream over ice and beat, circulating beater all around bowl to incorporate
air into cream, until doubled in volume; continue beating a few
minutes more, until beater leaves light traces on surface, and a bit of
cream lifted and dropped back softly retains its shape. This is now crème
Chantilly.
Remove the cream from the ice, and set the chocolate-meringue
mixture over it, beating for a few minutes until cool but not stiff—if
chocolate is warm it will deflate the whipped cream. Then, with a
rubber spatula, turn the crème Chantilly out on top of the chocolate,
and fold the two together, cutting down from surface of cream to
bottom of bowl with rubber spatula, and turning spatula against
side of bowl as you draw it out; continue rapidly, rotating bowl as
you fold. If the meringues are not yet ready, refrigerate the mousse.
4) Filling the mold
Not allowing it to touch sides of mold if you can help it, turn a
1-inch layer of mousse into the bottom of the mold; this will give
support to the meringues you are to place against the sides.
Remembering they are fragile and break easily, arrange the
meringues best side out against mold and upright around its edges,
spacing them about ¼ inch apart. Turn in another layer of mousse
about ¾ inch thick, cover with extra meringues, and continue filling
the mold with mousse and meringue layers, ending with a layer of
meringues. (Do not trim off protruding ends of upright meringues at
this point.) Cover mold with plastic wrap, and freeze for 6 hours at
least.
5) Unmolding and serving
To unmold the dessert, bend waxed paper back from edges of
mold, bend protruding meringue ends down over dessert, and turn a
chilled serving dish upside down over mold. Reverse the two and
dessert should unmold immediately—if not, reverse mold, run a
knife between waxed paper and edge of mold, and reverse again.
Carefully peel off waxed paper from top and sides. You need no
decoration on top, unless you have baked meringue decorations for
it or you wish to crumble leftover baked meringues over it.
Serve the Saint-Cyr immediately, accompanied by the optional
whipped cream or custard sauce.
Optional:
Either more crème Chantilly sweetened
with confectioner’s sugar and flavored with rum or vanilla;
Or crème anglaise (custard sauce)
Recipe From "Mastering The Art Of French Cooking Vol.2 "
https://www.goodreads.com/book/show/132692.Mastering_the_Art_of_French_Cooking
Whew! Perfection! Enjoy!
