Democratic Underground Latest Greatest Lobby Journals Search Options Help Login
Google

Photoshop experts: a question please.

Printer-friendly format Printer-friendly format
Printer-friendly format Email this thread to a friend
Printer-friendly format Bookmark this thread
This topic is archived.
Home » Discuss » The DU Lounge Donate to DU
 
Fire Walk With Me Donating Member (1000+ posts) Send PM | Profile | Ignore Fri Dec-21-07 06:45 PM
Original message
Photoshop experts: a question please.
Hi, I'm looking to see if a single color can be either removed from an image or made transparent.

I've tried the color replace tool to no avail, and the resulting edges aren't attractive. I'm using an old version (4.0).

I like to generate shapes and forms using it, but wish to expand into using layers (am just barely beginning to learn them as well). I have at least one two-color image, red and black, and I wish to remove the black background so that the reds can float over another image.

Thanks for any hints and tips. I hope that this is possible. I've tried the lasso tool but it's too uneven (the reds fade into the black).
Printer Friendly | Permalink |  | Top
ghostsofgiants Donating Member (1000+ posts) Send PM | Profile | Ignore Fri Dec-21-07 06:47 PM
Response to Original message
1. It'd be a lot easier to answer that if I knew the image you were working with...
Edited on Fri Dec-21-07 06:48 PM by primate1
And what exactly you were trying to do. The background eraser might be what you need but I can't say for sure.
Printer Friendly | Permalink |  | Top
 
Omphaloskepsis Donating Member (1000+ posts) Send PM | Profile | Ignore Fri Dec-21-07 06:52 PM
Response to Reply #1
4. The hippie types faster then I do..
And with less grammatical errors..
Printer Friendly | Permalink |  | Top
 
Fire Walk With Me Donating Member (1000+ posts) Send PM | Profile | Ignore Fri Dec-21-07 07:36 PM
Response to Reply #1
11. I've put them up a little further downthread. Thank you!
Printer Friendly | Permalink |  | Top
 
Omphaloskepsis Donating Member (1000+ posts) Send PM | Profile | Ignore Fri Dec-21-07 06:50 PM
Response to Original message
2. I would use the Background eraser if it is a solid color.
I don't know if that old of a copy has that tool. If you post the image I will turn the background transparent for you. I have time to kill.

You could use curves but that is kinda hard-core.
Printer Friendly | Permalink |  | Top
 
evlbstrd Donating Member (1000+ posts) Send PM | Profile | Ignore Fri Dec-21-07 06:52 PM
Response to Original message
3. Duplicate your image to a new layer.
Edited on Fri Dec-21-07 06:52 PM by evlbstrd
You'll now have two identical layers.
Name one Red and one Black.
Add a mask to each layer. Use the brush tool to paint your masks, revealing only the color you want on each layer.
Printer Friendly | Permalink |  | Top
 
Fire Walk With Me Donating Member (1000+ posts) Send PM | Profile | Ignore Fri Dec-21-07 07:06 PM
Response to Reply #3
5. Does the brush tool require the selection of a foreground and a background color?
Printer Friendly | Permalink |  | Top
 
evlbstrd Donating Member (1000+ posts) Send PM | Profile | Ignore Fri Dec-21-07 07:09 PM
Response to Reply #5
6. Just black or white.
Edited on Fri Dec-21-07 07:13 PM by evlbstrd
Black on the top layer mask reveals the next layer down.
edit: This in non-destructive; your image remains unchanged. As a quick shortcut, use the magic wand tool to select the color you want to mask out, go to the Select menu and choose Similar. Fill the selection with black. Fine tune the mask with the paint tools.
Printer Friendly | Permalink |  | Top
 
Fire Walk With Me Donating Member (1000+ posts) Send PM | Profile | Ignore Fri Dec-21-07 07:31 PM
Response to Reply #5
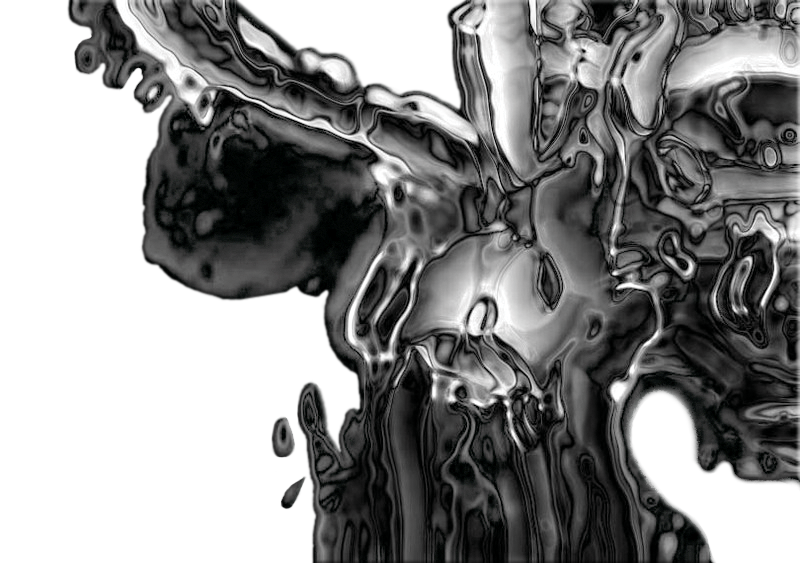
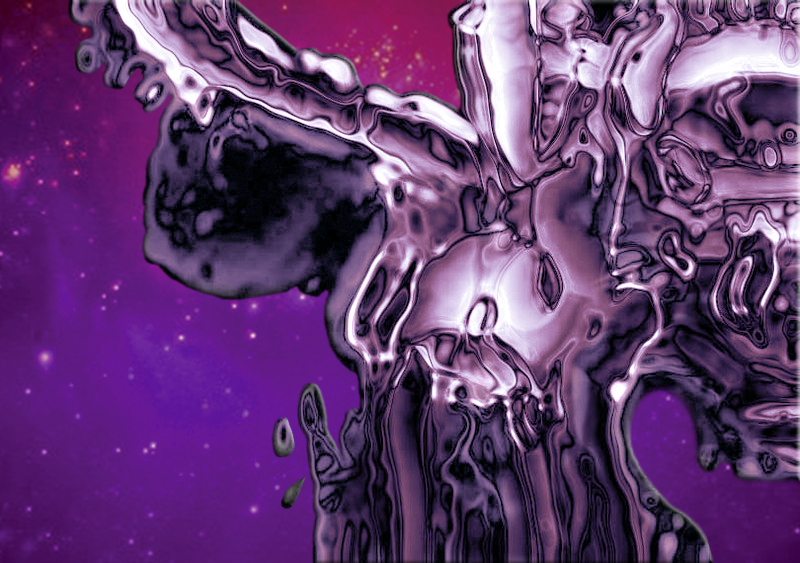
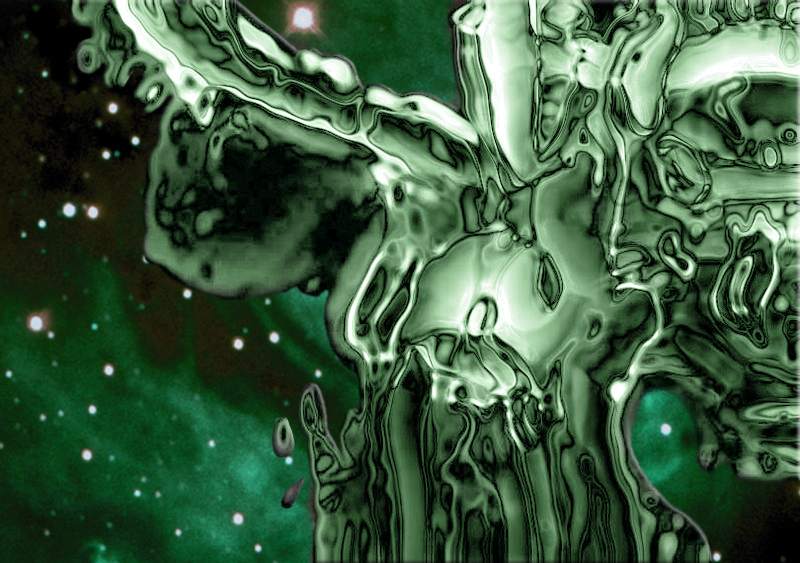
8. Here are two images in which I'd like to make the black transparent.
I generate things globally, without drawing or until extremely recently, any sort of editing of individual sections (lasso, paintbucket, etc.)

I'd like to have another image behind each of these, replacing the black.


Printer Friendly | Permalink |  | Top
 
Omphaloskepsis Donating Member (1000+ posts) Send PM | Profile | Ignore Fri Dec-21-07 07:36 PM
Response to Reply #8
10. Oh, crap... These are tough ones...
Using curves seems like the best bet. I will give that a shot.
Printer Friendly | Permalink |  | Top
 
evlbstrd Donating Member (1000+ posts) Send PM | Profile | Ignore Fri Dec-21-07 07:46 PM
Response to Reply #8
13. Switch to the Channels palette.
Convert to CMYK first. Select only the black channel. Copy it, return to the layers palette and past it into your layer mask. Fine tune from there.
Printer Friendly | Permalink |  | Top
 
Fire Walk With Me Donating Member (1000+ posts) Send PM | Profile | Ignore Fri Dec-21-07 07:47 PM
Response to Reply #13
14. I'll try it. Thank you very much! (Won't that alter the overall image coloration?)
Edited on Fri Dec-21-07 07:47 PM by Peake
Printer Friendly | Permalink |  | Top
 
evlbstrd Donating Member (1000+ posts) Send PM | Profile | Ignore Fri Dec-21-07 07:48 PM
Original message
I like to find easy ways to accomplish these things.
You could convert a copy of your RGB image to CMYK and use that as the source.
Printer Friendly | Permalink |  | Top
 
Fire Walk With Me Donating Member (1000+ posts) Send PM | Profile | Ignore Fri Dec-21-07 08:23 PM
Response to Original message
25. Thank you very much!
Printer Friendly | Permalink |  | Top
 
evlbstrd Donating Member (1000+ posts) Send PM | Profile | Ignore Fri Dec-21-07 08:41 PM
Response to Reply #25
26. You can also tweak layer transparency and blending modes.
Photoshop is an amazing chunk of code.
Printer Friendly | Permalink |  | Top
 
ghostsofgiants Donating Member (1000+ posts) Send PM | Profile | Ignore Fri Dec-21-07 07:57 PM
Response to Reply #8
16. How's this?
Not sure if it's quite what you want...


PNG files with alpha transparency. You won't see the transparency if you're using IE6 or older.
Printer Friendly | Permalink |  | Top
 
Fire Walk With Me Donating Member (1000+ posts) Send PM | Profile | Ignore Fri Dec-21-07 08:08 PM
Response to Reply #16
18. The red one works but as others said, the top one loses the black balance
within the boundaries I'd wanted to keep. I'd have to lasso the top one or something to separate it from the large, all-black areas.

I'm a newbie.. I don't know what a PNG with alpha transparency is :(

Thanks P1.
Printer Friendly | Permalink |  | Top
 
ghostsofgiants Donating Member (1000+ posts) Send PM | Profile | Ignore Fri Dec-21-07 08:14 PM
Response to Reply #18
21. PNG is an image format and just put it over another image in photoshop to see what I mean by alpha.
Printer Friendly | Permalink |  | Top
 
Fire Walk With Me Donating Member (1000+ posts) Send PM | Profile | Ignore Fri Dec-21-07 08:16 PM
Response to Reply #21
22. Thanks. I appreciate it.
Printer Friendly | Permalink |  | Top
 
ghostsofgiants Donating Member (1000+ posts) Send PM | Profile | Ignore Fri Dec-21-07 08:20 PM
Response to Reply #22
23. No problem.
Hopefully someone else can make the white one work.
Printer Friendly | Permalink |  | Top
 
Omphaloskepsis Donating Member (1000+ posts) Send PM | Profile | Ignore Fri Dec-21-07 08:22 PM
Response to Reply #18
24. I curved the top one. It might work.


I made the blacks stand out more. And it is a PNG with transparency.
Printer Friendly | Permalink |  | Top
 
China_cat Donating Member (1000+ posts) Send PM | Profile | Ignore Fri Dec-21-07 07:13 PM
Response to Original message
7. If it's a solid color
use the magic wand to select it and then hit ctrl-x. If there's some variation in the color, find the box that says tolerance and increase the value by small amounts until the magic wand selects all you want it to.

if it seems like you've got edges, go back and modify the selection (while it's still open) by expanding it 1 or 2 pixels at a time and then cutting out the extra

That's the easiest way to do it. The others have given you other ideas that will also work.

If you want to send it to me, I could do it for you and send it back as a .psd or .png which will retain the transparency and the color depth.
Printer Friendly | Permalink |  | Top
 
Fire Walk With Me Donating Member (1000+ posts) Send PM | Profile | Ignore Fri Dec-21-07 07:33 PM
Response to Reply #7
9. Thank you very much. I'll try those tips. Please see the two images I've just posted in subthread...
Printer Friendly | Permalink |  | Top
 
China_cat Donating Member (1000+ posts) Send PM | Profile | Ignore Fri Dec-21-07 07:46 PM
Response to Reply #9
12. The red one won't be so bad
but the black one will. Too many shades of gray and blends.
Printer Friendly | Permalink |  | Top
 
Fire Walk With Me Donating Member (1000+ posts) Send PM | Profile | Ignore Fri Dec-21-07 07:48 PM
Response to Reply #12
15. Thanks. That's what I was afraid of.
That image isn't "finished" yet, but I don't know what else to do with it.
Printer Friendly | Permalink |  | Top
 
China_cat Donating Member (1000+ posts) Send PM | Profile | Ignore Fri Dec-21-07 08:04 PM
Response to Reply #15
17. Ok, here's how you can recreate it and prevent the problems
open a new image, whatever size you want it and with either a black or transparent background.

Add a new layer. Select it and paint your red/black/silver whatever on the new layer. Select your original layer and put whatever you want in it.

If you are using several colors, use a new layer for each one and play with the layer modes. You'll be surprised at the effects you get. It sounds like you have played with layers a lot, yet. Once you do, you'll never want to do it any other way.

Save the whole thing .psd format to preserve the layers. Play with them until you get what you can live with then merge/all and save as either a different name .psd or in .jpg format

I wish I could do more for you with these but I don't think you're going to be satisfied with anything that could be done with them.
Printer Friendly | Permalink |  | Top
 
Fire Walk With Me Donating Member (1000+ posts) Send PM | Profile | Ignore Fri Dec-21-07 08:09 PM
Response to Reply #17
19. Thanks, I appreciate it. If these images are a dead end, no problem. Now I can try new things!
Printer Friendly | Permalink |  | Top
 
China_cat Donating Member (1000+ posts) Send PM | Profile | Ignore Fri Dec-21-07 08:11 PM
Response to Reply #19
20. Well, you can still try new things
even if you're able to work out these ones. :silly:
Printer Friendly | Permalink |  | Top
 
Bongo Prophet Donating Member (1000+ posts) Send PM | Profile | Ignore Sat Dec-22-07 12:21 AM
Response to Original message
27. I can't remember how many features are in PS4. Layer effects?
Edited on Sat Dec-22-07 12:24 AM by Bongo Prophet
If you are running XP, Vista, Linux or OsX - you might add GIMP to your toolset.
While it is a very good exercise to stretch older software to your needs, sometimes there are easier ways available.
(I remember when PS3 came out...Layers! Life changed at that point.)

It is free and open source.
http://gimp.org/about/introduction.html

After all, if you are playing a synth with only 12db filter, no noise source and no ringmod, there are certain things you just can't do, right? ;)
Edit to add -- GIMP can use MIDI to control some things - wtf? I have not tried this yet, as all my midi is sort of separate from my gfx machine, but...hmm.
Good luck - those are some interesting gloopy images to work with...

Printer Friendly | Permalink |  | Top
 
JeffR Donating Member (1000+ posts) Send PM | Profile | Ignore Sat Dec-22-07 12:29 AM
Response to Reply #27
28. Not to hijack the discussion, but
GIMP can use MIDI? Is there more info on this anywhere? I just got an adrenaline rush reading that.

Printer Friendly | Permalink |  | Top
 
Bongo Prophet Donating Member (1000+ posts) Send PM | Profile | Ignore Sat Dec-22-07 12:55 AM
Response to Reply #28
30. Yeah, it's pretty cool to think of modulating brush size with an LFO, right?
Yes, I already thought mentioning gimp could lead to a sidetrack, but not too much harm, since others have had such good ( and to the point!) suggestions.
I had just checked out to see if gimp had been updated for vista, in order to help out a friend in need of it.

And was stunned by how far they have come in the last year or so -- customize the GUI, 100s of plugins, cool...then the MIDI comment hit me, and time slooowed down as I pondered the implications.

I also knew Mr. Peake would appreciate that, even if it isn't quite control voltages. :evilgrin:

http://gimp.org/features/


Printer Friendly | Permalink |  | Top
 
JeffR Donating Member (1000+ posts) Send PM | Profile | Ignore Sat Dec-22-07 01:10 AM
Response to Reply #30
31. Oh man!
I installed GIMP a month or so ago and haven't played with it much yet. This just tilts the horizon in a really appealing way.

Printer Friendly | Permalink |  | Top
 
Bongo Prophet Donating Member (1000+ posts) Send PM | Profile | Ignore Sat Dec-22-07 01:38 AM
Response to Reply #31
32. I think this is a legitimate subthread, because you and Peake and I all do synths/gfx
What are some of the ideas, assuming realtime sequencing changes in gimp, that you would find most intriguing?

Of course, hardware knobs and sliders, or midi notes come immediately to mind, but also...
Controlling brushes, layers, colors, etc. with a sequencer, such as:

Numerology on mac


OR

Artwonk or Softstep on XP/Vista


Printer Friendly | Permalink |  | Top
 
JeffR Donating Member (1000+ posts) Send PM | Profile | Ignore Sat Dec-22-07 01:50 AM
Response to Reply #32
33. Yes, both directions
Visuals from sequences and sequences from visuals.

I spent three months obsessively working with Coagula a few years ago. The results were cheerfully tough listening. But I like the notion of different senses cross-pollinating through technology like this, eyes making something for the ears or ears for eyes.

Printer Friendly | Permalink |  | Top
 
Bongo Prophet Donating Member (1000+ posts) Send PM | Profile | Ignore Sat Dec-22-07 02:16 AM
Response to Reply #33
35. Yeah, synesthesia indeed. I hope Peake adds to this, being a Buchla man and all.
He could be modulatin' from his most lovely buchla modular >to cv to midi (doepher makes those > into computer.


PLease give me a heads up if you hit any mind blowing revelations< and how well anything works in realtime.
Are you on PC or mac or other? (I have both, plus amigas and modulars, so really interested...)


Printer Friendly | Permalink |  | Top
 
Fire Walk With Me Donating Member (1000+ posts) Send PM | Profile | Ignore Sat Dec-22-07 03:05 AM
Response to Reply #35
37. MIDI- Feh!
Break out your MC4 for true CV/Gate timing action, boyee.
Printer Friendly | Permalink |  | Top
 
Bongo Prophet Donating Member (1000+ posts) Send PM | Profile | Ignore Sat Dec-22-07 04:26 AM
Response to Reply #37
42. Oh, don't go there mon. A CV vs. midi battle on DU? Never thought we'd see that.
We better back away slowly. This place will explode!
:popcorn: :popcorn::nuke: :popcorn: :popcorn:


Ahhh, not at all.
Me, soy ecumenico.

The sound of crickets is a LOVELY thing. :thumbsup:
Printer Friendly | Permalink |  | Top
 
JeffR Donating Member (1000+ posts) Send PM | Profile | Ignore Sat Dec-22-07 01:56 PM
Response to Reply #35
45. Mac for the MIDI stuff, PC for mastering
That photo makes me drool.;-)

Printer Friendly | Permalink |  | Top
 
Fire Walk With Me Donating Member (1000+ posts) Send PM | Profile | Ignore Sat Dec-22-07 02:18 PM
Response to Reply #45
47. No tubes in a computer. Very sad...
Printer Friendly | Permalink |  | Top
 
MagickMuffin Donating Member (1000+ posts) Send PM | Profile | Ignore Sat Dec-22-07 12:53 AM
Response to Original message
29. I hope you won't mind, but see if this is something you were looking for
Image was saved as a PNG.

I was so inspired I took the liberty to add a couple of backgrounds. I have them on my Flickr acct, so you can view them. However, if you want me to remove/delete them I will, no problem. After uploading I received a message stating I've reach my free limit. Will you let me know if you can view them???

And if you want me to post them here let me know and I will gladly add them. Also if you are interested in my steps I will try and help you as much as possible, although you should know I use PSCS, and have a hard time remembering what PS4 will do.

Of course I encourage you to continue mastering PS. I have been using for several years and I still don't know everything there is to know. But I do manage to get by with what I know all the while picking up new tips and tricks as I go. So, keep playing around. Just remember to copy your original layer (Command J or Control J, will make a new copy for you) and play on the top most layer. If your using a mask, be sure to hide the bottom layer so you can tell what you're doing.


Let me know what you think, Peake:hi: And thx for letting us play.


Printer Friendly | Permalink |  | Top
 
Fire Walk With Me Donating Member (1000+ posts) Send PM | Profile | Ignore Sat Dec-22-07 03:08 AM
Response to Reply #29
38. Thanks for the tips...
I cannot open your flickr account, only the single image. Reducing the URL size doesn't work and properties doesn't help either. PM me a link, or post it publicly please?

I don't mind at all. It's not like I'm ever going to make any money doing this. I'm just enjoying myself.

What you've posted is exactly what I was after, as is the red one Primate1 posted, but in this case, it doesn't look like it'll be very fruitful. At least I know now. There's only so far that I can go with the specific technique that I was working with. Thanks for the new ideas....
Printer Friendly | Permalink |  | Top
 
MagickMuffin Donating Member (1000+ posts) Send PM | Profile | Ignore Sat Dec-22-07 03:25 AM
Response to Reply #38
39. Well Flickr did let me have access to the code, so here they are. I hope you like them ;=D
I'm thrilled to know what you were looking for, and I picked up on it. I used the lasso tool after creating a mask, cut away the background, fine tuned it with the brush, added a Gaussian blur, I also added a bevel, but I'm not sure PS 4 has those functions.:shrug:


Tell me what you think....:hi:


Printer Friendly | Permalink |  | Top
 
Fire Walk With Me Donating Member (1000+ posts) Send PM | Profile | Ignore Sat Dec-22-07 03:31 AM
Response to Reply #39
40. Hey, it works! Perhaps someday I might gain those skills.
Thanks for pointing the direction. Interesting compositing!
Printer Friendly | Permalink |  | Top
 
MagickMuffin Donating Member (1000+ posts) Send PM | Profile | Ignore Sat Dec-22-07 03:49 AM
Response to Reply #40
41. Your Welcome Peake
If you ever need advice I'll try and help if I can. :hi:

Printer Friendly | Permalink |  | Top
 
MagickMuffin Donating Member (1000+ posts) Send PM | Profile | Ignore Sat Dec-22-07 05:50 PM
Response to Reply #40
49. If your interested in viewing a political video I composited together
then you can check it out here.

http://www.youtube.com/watch?v=zxZkYVCng4E


Also if you use the image up thread that I did, then will you post your results??

I would :loveya: to see what you had in mind. If you ever need any tips such as short cuts, or how to fine tune a layer mask, turning selections into alpha channels, I might be able to help you along.:shrug:

After viewing my video, you'll realize just how much work went into it. Although I kinda got fatigue after awhile and just wanted to be done with it. ;=D


Printer Friendly | Permalink |  | Top
 
begin_within Donating Member (1000+ posts) Send PM | Profile | Ignore Sat Dec-22-07 02:04 AM
Response to Original message
34. You may want to experiment with the "Blending Options" sliders...


This is a little-used feature of Photoshop that can create sophisticated effects. It only works on a layer, it doesn't work on the background. So you must have a layer. I would place the red artwork on a layer above the black artwork. (Just copy the entire red image, go to the black image, and choose Paste, then that will automatically create a new layer and put the red artwork into it.

To get to Blending Options, choose Layer -> Layer Sytle -> Blending Options.
The dialog box above will appear, or something very similar to it. The "Blend If" option will initially be set to gray. Click on it and change it to Red. Then experiment with the sliders - those little black and white triangles. To get the two white triangles to separate, hold down the Option key or Alt key as you click on them. Then they will separate and you can move them independently.

You can also play around with the other options in that dialog box, such as Blend Mode, Fill Opacity, Knockout, etc., but I don't know if they will help. I think the sliders at the bottom are going to be the most useful for your purpose.
Printer Friendly | Permalink |  | Top
 
Fire Walk With Me Donating Member (1000+ posts) Send PM | Profile | Ignore Sat Dec-22-07 02:58 AM
Response to Reply #34
36. I see it. Blending Options is not as complete in 4.0 as what you've shown, but
it should be enough to go for. I appreciate your having taken the time to help me on this. Thanks for the tips.
Printer Friendly | Permalink |  | Top
 
begin_within Donating Member (1000+ posts) Send PM | Profile | Ignore Sat Dec-22-07 10:32 AM
Response to Reply #36
43. You're welcome - that screen shot was from Photoshop 7.0 on a Mac, so
your version will undoubtedly be different. There are probably ways to achieve what you want to do without having to go in and manually select pixels with the lasso tool. Photoshop 7.0 has a "Select Color Range" command which is very useful in situations like yours but I don't know if that is in Photoshop 4.0. The "Similar" command under the Select menu might be helpful, if you select some pixels and then give the "Similar" command it will go through the image and select all the pixels in the same color range that you have already selected.
Printer Friendly | Permalink |  | Top
 
ElsewheresDaughter Donating Member (1000+ posts) Send PM | Profile | Ignore Sat Dec-22-07 10:35 AM
Response to Original message
44. www.lunapic.com...has all the tools you need
www.lunapic.com
Printer Friendly | Permalink |  | Top
 
Fire Walk With Me Donating Member (1000+ posts) Send PM | Profile | Ignore Sat Dec-22-07 02:17 PM
Response to Reply #44
46. Thank you!
Printer Friendly | Permalink |  | Top
 
hyphenate Donating Member (1000+ posts) Send PM | Profile | Ignore Sat Dec-22-07 02:50 PM
Response to Original message
48. If you are working with just a 2 color image
the answer is soo simple you will bang your head when I'm through.

First of all, make sure that you only have two colors by reducing the actual color depth to 2. Then save your image as a GIF. BTW, JPEGs can't have transparencies, only GIFs.

Then go and make sure you are working with the RGB color mode, and select the color table. It will give you a choice of what color you want to be transparent, so select the black, and voila! Your black is now transparent, with only the red showing up.
Printer Friendly | Permalink |  | Top
 
DU AdBot (1000+ posts) Click to send private message to this author Click to view 
this author's profile Click to add 
this author to your buddy list Click to add 
this author to your Ignore list Fri May 03rd 2024, 08:47 AM
Response to Original message
Advertisements [?]
 Top

Home » Discuss » The DU Lounge Donate to DU

Powered by DCForum+ Version 1.1 Copyright 1997-2002 DCScripts.com
Software has been extensively modified by the DU administrators


Important Notices: By participating on this discussion board, visitors agree to abide by the rules outlined on our Rules page. Messages posted on the Democratic Underground Discussion Forums are the opinions of the individuals who post them, and do not necessarily represent the opinions of Democratic Underground, LLC.

Home  |  Discussion Forums  |  Journals |  Store  |  Donate

About DU  |  Contact Us  |  Privacy Policy

Got a message for Democratic Underground? Click here to send us a message.

© 2001 - 2011 Democratic Underground, LLC